How to install Terraform on Linux
2018年10月07日
https://www.terraform.io/intro/getting-started/install.html
Obtain the Linux 64bit download URL (e.g. https://releases.hashicorp.com/terraform/0.11.8/terraform_0.11.8_linux_amd64.zip)
The download URL could be modified to meet specific version requirements:
https://releases.hashicorp.com/terraform/0.11.3/terraform_0.11.3_linux_amd64.zip
Launch an AWS EC2 with AMI Ubuntu 18.
/home/ubuntu# ls
/home/ubuntu# unzip terraform_*_linux_amd64.zip -d /usr/local/bin
/home/ubuntu# terraform --version
ec2-user:~/environment $ export Terraform_Version=0.13.4
ec2-user:~/environment $ echo $Terraform_Version
ec2-user:~/environment $ curl -O https://releases.hashicorp.com/terraform/${Terraform_Version}/terraform_${Terraform_Version}_linux_amd64.zip
Unzip the downloaded Terraform file to directory "/usr/local/bin".
ec2-user:~/environment $ sudo unzip terraform_${Terraform_Version}_linux_amd64.zip -d /usr/local/bin
ec2-user:~/environment $ terraform --version
On Amazon Linux 2
sudo yum install -y yum-utils
sudo yum-config-manager --add-repo https://rpm.releases.hashicorp.com/AmazonLinux/hashicorp.repo
sudo yum -y install terraform
terraform -help
Provision a EFS file system.
On RHEL8
Launch a temporary EC2 instance, e.g. RHEL 8.
sudo yum install -y nfs-utils vim git rpm-build unzip make rpm-build && \
sudo service nfs-server start && \
sudo mkdir -p /terraform_data
sudo chown ec2-user:ec2-user -R /terraform_data/
curl "https://teccn-terraform.s3.cn-north-1.amazonaws.com.cn/download/awscliv2.v2.3.0.zip" -o "awscliv2.zip"
unzip awscliv2.zip
sudo ./aws/install
aws configure set default.region cn-north-1
aws s3 cp s3://teccn-terraform/download/efs-utils.20211023.zip efs-utils.zip
unzip efs-utils.zip -d efs-utils
cd efs-utils/
make rpm
sudo yum -y install ./build/amazon-efs-utils*rpm
cd ..
sudo pip3 install botocore --upgrade
git config --global credential.helper '!aws codecommit credential-helper $@'
git config --global credential.useHttpPath true
export Terraform_Version=1.0.9
aws s3 cp s3://teccn-terraform/download/terraform_${Terraform_Version}_linux_amd64.zip .
sudo unzip terraform_${Terraform_Version}_linux_amd64.zip -d /usr/local/bin
terraform init
rm -f main.tf
rm -f awscliv2.zip
rm -rf aws/
rm -rf efs-utils/
rm -rf efs-utils-master/
rm -f efs-utils.zip
rm -f terraform_${Terraform_Version}_linux_amd64.zip
Shutdown this EC2 instance and build an AMI based on this.
# git config --global user.name "Leo"
# git config --global user.email "liusong.du@accenture.com"
sudo mount -t efs -o tls fs-0c82ddb9b151dccd0:/ /terraform_data/
sudo mount -t efs -o tls fs-038e66f0e38ec249a:/ /terraform_data/
Terminate this server and launch a new server
User data:
Post actions
Below command only need to be executed once, unless need to clone the repository to another place. Normally the IaC code should be well kept in the EFS file system, and there is no need to repeatedly clone it to local.
aws configure set aws_access_key_id AKxx3M
aws configure set aws_secret_access_key lyxx3X
git clone https://git-codecommit.cn-north-1.amazonaws.com.cn/v1/repos/TerraformIaC .
# cd TerraformIaC/
# touch readme.MD
# touch .gitignore
# vim main.tf
After that, please .
# git add .
# git commit -m "Added EC2 TF code for test."
# git push origin master
How to provsion to other AWS accounts:
-
References
https://www.terraform.io/downloads.html
In this post, I will demonstratre how to install Terraform on a Linux Server.
Install the packages and dependencies.
/home/ubuntu# apt-get install unzip
Reading package lists... Done
Building dependency tree
Reading state information... Done
Suggested packages:
  zip
The following NEW packages will be installed:
  unzip
0 upgraded, 1 newly installed, 0 to remove and 0 not upgraded.
Need to get 158 kB of archives.
After this operation, 530 kB of additional disk space will be used.
Get:1 http://ap-northeast-2.ec2.archive.ubuntu.com/ubuntu xenial/main amd64 unzip amd64 6.0-20ubuntu1 [158 kB]
Fetched 158 kB in 0s (10.1 MB/s)
Selecting previously unselected package unzip.
(Reading database ... 51284 files and directories currently installed.)
Preparing to unpack .../unzip_6.0-20ubuntu1_amd64.deb ...
Unpacking unzip (6.0-20ubuntu1) ...
Processing triggers for mime-support (3.59ubuntu1) ...
Processing triggers for man-db (2.7.5-1) ...
Setting up unzip (6.0-20ubuntu1) ...
Obtain the Downloadable URL
Install Terraform (Official Document)https://www.terraform.io/intro/getting-started/install.html
Obtain the Linux 64bit download URL (e.g. https://releases.hashicorp.com/terraform/0.11.8/terraform_0.11.8_linux_amd64.zip)
The download URL could be modified to meet specific version requirements:
https://releases.hashicorp.com/terraform/0.11.3/terraform_0.11.3_linux_amd64.zip
Install Terraform on AWS EC2 with Ubuntu 18
Prepare hosting machine
Launch an AWS EC2 with AMI Ubuntu 18.
Install Terraform
/home/ubuntu# curl -O https://releases.hashicorp.com/terraform/0.13.4/terraform_0.13.4_linux_amd64.zip % Total % Received % Xferd Average Speed Time Time Time Current
Dload Upload Total Spent Left Speed
100 33.2M 100 33.2M 0 0 5532k 0 0:00:06 0:00:06 --:--:-- 7332k
/home/ubuntu# ls
snap terraform_0.13.4_linux_amd64.zipUnzip the downloaded Terraform file to directory "/usr/local/bin".
/home/ubuntu# unzip terraform_*_linux_amd64.zip -d /usr/local/bin
Archive:  terraform_0.13.4_linux_amd64.zip
  inflating: /usr/local/bin/terraform
/home/ubuntu# terraform --version
Terraform v0.13.4
Install Terraform on AWS Cloud9 (EC2)
Prepare hosting machine
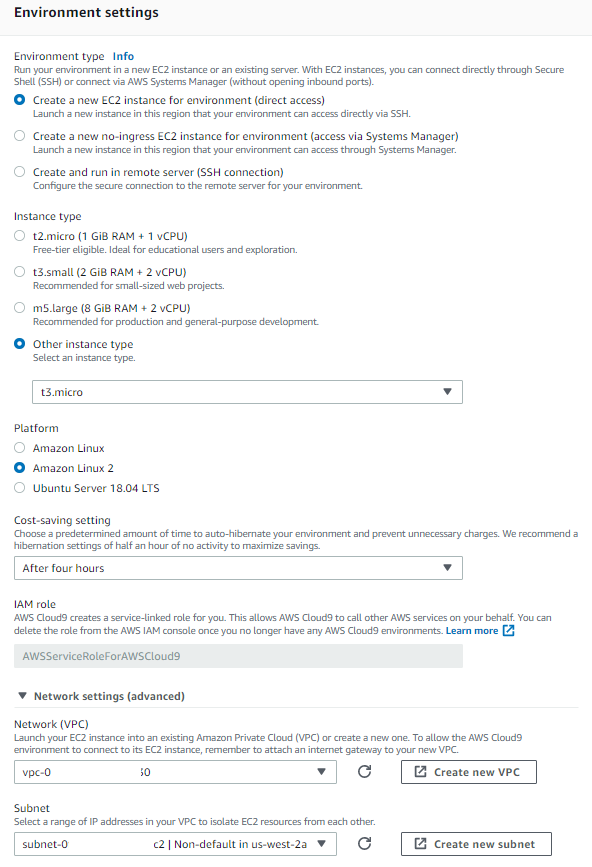
For how to create an AWS Cloud9 (EC2) environment, refer to blog post.Install Terraform
Modify the version according to your requirement.ec2-user:~/environment $ export Terraform_Version=0.13.4
ec2-user:~/environment $ echo $Terraform_Version
0.13.4
ec2-user:~/environment $ curl -O https://releases.hashicorp.com/terraform/${Terraform_Version}/terraform_${Terraform_Version}_linux_amd64.zip
  % Total    % Received % Xferd  Average Speed   Time    Time     Time  Current
                                 Dload  Upload   Total   Spent    Left  Speed
100 33.2M  100 33.2M    0     0  48.3M      0 --:--:-- --:--:-- --:--:-- 48.2M
Unzip the downloaded Terraform file to directory "/usr/local/bin".
ec2-user:~/environment $ sudo unzip terraform_${Terraform_Version}_linux_amd64.zip -d /usr/local/bin
Archive:  terraform_0.13.4_linux_amd64.zip
  inflating: /usr/local/bin/terraform
ec2-user:~/environment $ terraform --version
Terraform v0.13.4-
On Amazon Linux 2
sudo yum install -y yum-utils
已加载插件:extras_suggestions, langpacks, priorities, update-motd
amzn2-core                                                                             | 3.7 kB  00:00:00
软件包 yum-utils-1.1.31-46.amzn2.0.1.noarch 已安装并且是最新版本
无须任何处理
sudo yum-config-manager --add-repo https://rpm.releases.hashicorp.com/AmazonLinux/hashicorp.repo
已加载插件:extras_suggestions, langpacks, priorities, update-motd
adding repo from: https://rpm.releases.hashicorp.com/AmazonLinux/hashicorp.repo
grabbing file https://rpm.releases.hashicorp.com/AmazonLinux/hashicorp.repo to /etc/yum.repos.d/hashicorp.repo
repo saved to /etc/yum.repos.d/hashicorp.repo
sudo yum -y install terraform
已加载插件:extras_suggestions, langpacks, priorities, update-motd
hashicorp                                                                              | 1.4 kB  00:00:00
hashicorp/2/x86_64/primary                                                             |  63 kB  00:00:00
hashicorp                                                                                             447/447
正在解决依赖关系
--> 正在检查事务
---> 软件包 terraform.x86_64.0.1.0.9-1 将被 安装
--> 解决依赖关系完成

依赖关系解决

==============================================================================================================
 Package                    架构                    版本                     源                          大小
==============================================================================================================
正在安装:
 terraform                  x86_64                  1.0.9-1                  hashicorp                   25 M

事务概要
==============================================================================================================
安装  1 软件包

总下载量:25 M
安装大小:76 M
Downloading packages:
警告:/var/cache/yum/x86_64/2/hashicorp/packages/terraform-1.0.9-1.x86_64.rpm: 头V4 RSA/SHA512 Signature, 密钥 ID a3219f7b: NOKEY
terraform-1.0.9-1.x86_64.rpm 的公钥尚未安装
terraform-1.0.9-1.x86_64.rpm                                                           |  25 MB  00:00:01
从 https://rpm.releases.hashicorp.com/gpg 检索密钥
导入 GPG key 0xA3219F7B:
 用户ID     : "HashiCorp Security (HashiCorp Package Signing) <security+packaging@hashicorp.com>"
 指纹       : e8a0 32e0 94d8 eb4e a189 d270 da41 8c88 a321 9f7b
 来自       : https://rpm.releases.hashicorp.com/gpg
Running transaction check
Running transaction test
Transaction test succeeded
Running transaction
  正在安装    : terraform-1.0.9-1.x86_64                                                                  1/1
  验证中      : terraform-1.0.9-1.x86_64                                                                  1/1

已安装:
  terraform.x86_64 0:1.0.9-1

完毕!
terraform -help
Usage: terraform [global options] <subcommand> [args]

The available commands for execution are listed below.
The primary workflow commands are given first, followed by
less common or more advanced commands.

Main commands:
  init          Prepare your working directory for other commands
  validate      Check whether the configuration is valid
  plan          Show changes required by the current configuration
  apply         Create or update infrastructure
  destroy       Destroy previously-created infrastructure

All other commands:
  console       Try Terraform expressions at an interactive command prompt
  fmt           Reformat your configuration in the standard style
  force-unlock  Release a stuck lock on the current workspace
  get           Install or upgrade remote Terraform modules
  graph         Generate a Graphviz graph of the steps in an operation
  import        Associate existing infrastructure with a Terraform resource
  login         Obtain and save credentials for a remote host
  logout        Remove locally-stored credentials for a remote host
  output        Show output values from your root module
  providers     Show the providers required for this configuration
  refresh       Update the state to match remote systems
  show          Show the current state or a saved plan
  state         Advanced state management
  taint         Mark a resource instance as not fully functional
  test          Experimental support for module integration testing
  untaint       Remove the 'tainted' state from a resource instance
  version       Show the current Terraform version
  workspace     Workspace management

Global options (use these before the subcommand, if any):
  -chdir=DIR    Switch to a different working directory before executing the
                given subcommand.
  -help         Show this help output, or the help for a specified subcommand.
  -version      An alias for the "version" subcommand.
-Provision a EFS file system.
On RHEL8
Launch a temporary EC2 instance, e.g. RHEL 8.
sudo yum install -y nfs-utils vim git rpm-build unzip make rpm-build && \
sudo service nfs-server start && \
sudo mkdir -p /terraform_data
sudo chown ec2-user:ec2-user -R /terraform_data/
curl "https://teccn-terraform.s3.cn-north-1.amazonaws.com.cn/download/awscliv2.v2.3.0.zip" -o "awscliv2.zip"
unzip awscliv2.zip
sudo ./aws/install
aws configure set default.region cn-north-1
aws s3 cp s3://teccn-terraform/download/efs-utils.20211023.zip efs-utils.zip
unzip efs-utils.zip -d efs-utils
cd efs-utils/
make rpm
sudo yum -y install ./build/amazon-efs-utils*rpm
cd ..
sudo pip3 install botocore --upgrade
git config --global credential.helper '!aws codecommit credential-helper $@'
git config --global credential.useHttpPath true
export Terraform_Version=1.0.9
aws s3 cp s3://teccn-terraform/download/terraform_${Terraform_Version}_linux_amd64.zip .
sudo unzip terraform_${Terraform_Version}_linux_amd64.zip -d /usr/local/bin
cat <<EOF >> main.tf
terraform {
  required_providers {
    aws = {
      source  = "hashicorp/aws"
      version = "~> 3.27"
    }
  }

  required_version = ">= 0.14.9"
}

provider "aws" {
  profile = "default"
  region  = "cn-north-1"
}
EOF
terraform init
rm -f main.tf
rm -f awscliv2.zip
rm -rf aws/
rm -rf efs-utils/
rm -rf efs-utils-master/
rm -f efs-utils.zip
rm -f terraform_${Terraform_Version}_linux_amd64.zip
Shutdown this EC2 instance and build an AMI based on this.
# git config --global user.name "Leo"
# git config --global user.email "liusong.du@accenture.com"
sudo mount -t efs -o tls fs-0c82ddb9b151dccd0:/ /terraform_data/
sudo mount -t efs -o tls fs-038e66f0e38ec249a:/ /terraform_data/
Terminate this server and launch a new server
User data:
#!/bin/bash
set -o xtrace
yum install -y unzip git nfs-utils rpm-build vim

curl "https://teccn-terraform.s3.cn-north-1.amazonaws.com.cn/download/awscliv2.v2.3.0.zip" -o "awscliv2.zip"

unzip awscliv2.zip
sudo ./aws/install
Terraform_Version=1.0.9
curl -O https://releases.hashicorp.com/terraform/${Terraform_Version}/terraform_${Terraform_Version}_linux_amd64.zip
unzip terraform_${Terraform_Version}_linux_amd64.zip -d /usr/local/bin
service nfs-server start
mount -t efs fs-0c82ddb9b151dccd0:/ /terraform_data
aws s3 cp s3://teccn-terraform/efs-utils-master.zip .
unzip efs-utils-master.zip
cd efs-utils-master
yum -y install make
yum -y install rpm-build
make rpm
yum -y install ./build/amazon-efs-utils*rpm
cd ..
aws s3 cp s3://teccn-terraform/download/get-pip.20211023.py get-pip.py
python3 get-pip.py
Post actions
Below command only need to be executed once, unless need to clone the repository to another place. Normally the IaC code should be well kept in the EFS file system, and there is no need to repeatedly clone it to local.
aws configure set aws_access_key_id AKxx3M
aws configure set aws_secret_access_key lyxx3X
git clone https://git-codecommit.cn-north-1.amazonaws.com.cn/v1/repos/TerraformIaC .
# cd TerraformIaC/
# touch readme.MD
# touch .gitignore
# vim main.tf
terraform {
  required_providers {
    aws = {
      source  = "hashicorp/aws"
      version = "~> 3.27"
    }
  }

  required_version = ">= 0.14.9"
}

provider "aws" {
  profile = "default"
  region  = "cn-north-1"
}

resource "aws_instance" "app_server" {
  ami           = "ami-0321b103323b5d57b"
  instance_type = "t2.micro"

  tags = {
    Name = "ExampleAppServerInstance"
  }
}
After that, please .
# git add .
# git commit -m "Added EC2 TF code for test."
# git push origin master
How to provsion to other AWS accounts:
terraform {
  required_providers {
    aws = {
      source  = "hashicorp/aws"
      version = "~> 3.27"
    }
  }

  required_version = ">= 0.14.9"
}

provider "aws" {
  profile = "default"
  region  = "cn-north-1"

  assume_role {
    role_arn     = "arn:aws-cn:iam::2404xxxx5558:role/OrganizationAccountAccessRole"
    session_name = "YiZhanFengShen"
    external_id  = "EXTERNAL_ID"
  }
}

resource "aws_instance" "app_server" {
  ami           = "ami-0321xxxxd57b"
  instance_type = "t2.micro"

  tags = {
    Name = "AssumeRoleTest"
  }
}
-
References
https://www.terraform.io/downloads.html